Materials:
A - 4mm Swarovski Bicone #5328 289 Indian Pink AB x 21 pcs
B - 4mm Swarovski Bicone #5328 508 Roseline AB x 24 pcs
C - 11/0 TOHO Seed Beads #21 x 75 pcs
D - Crimp bead silver plated x 2 pcs
E - Lobster Clasp x 1 pc
F - Clam Shell x 2 pcs
G - Extender Chain x 1 pc
H - 0.25 mm Non-Elastic Bead Thread x 1 pc (Length: 80cm)
Tooling:
Flat nose pliers
Round nose pliers
Let's start:
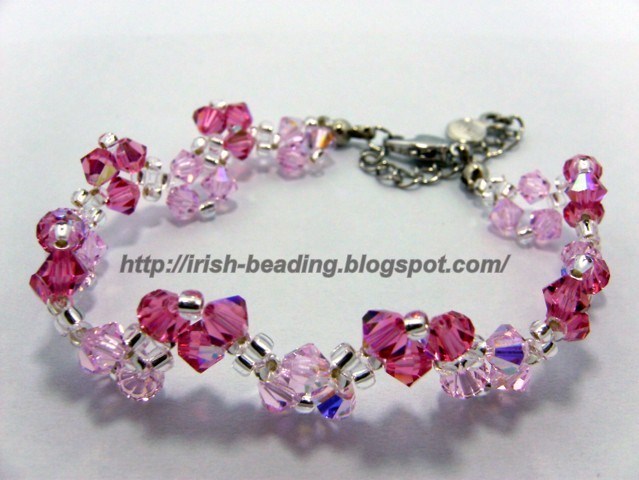
String the Swarovski Beads using bead thread by follow the beading diagram below.
Stop beading once your desire length of bracelet is achieved. If the length of bracelet too long, not nice ooo…
How to start and end the findings? Please refer to Basic Technique: How to use Clamshell and Crimp Bead.
Tuesday, May 17, 2011
Zircon Flower Ring
Materials:
A - 8mm RD Zircon Bead, Cone, Faceted, Side-Drilled x 10 pcs
B – 4mm Swarovski Bicone #5328 Crystal AB 001 x 5 pcs
C – 2.5mm Swarovski Bicone #5328 Crystal AB 001 x 64 pcs
D - 0.25 mm Non-Elastic Bead Thread x 1 pc (Length: 50cm)
Tooling:
Cutter
Let's start:
Step1: String the Swarovski (item B) and Zircon Beads (item A) using bead thread by follow the beading diagram below to complete the Ring Flower. Pull the bead thread tightly.
Step2: Follow the second beading diagram to make the size ring, string 2.5mm Swarovski Beads (item C) and stop beading once your desire size ring is achieved. Make a simple knot and string another few beads. Cut the excess string. An elegant and shinny ring is completed.
Wear it during dinner and party time. And sure a lot of people will look at your hand.
Note: You may use other type of beads (cheaper cost) to replace item C!!!
A - 8mm RD Zircon Bead, Cone, Faceted, Side-Drilled x 10 pcs
B – 4mm Swarovski Bicone #5328 Crystal AB 001 x 5 pcs
C – 2.5mm Swarovski Bicone #5328 Crystal AB 001 x 64 pcs
D - 0.25 mm Non-Elastic Bead Thread x 1 pc (Length: 50cm)
Tooling:
Cutter
Let's start:
Step1: String the Swarovski (item B) and Zircon Beads (item A) using bead thread by follow the beading diagram below to complete the Ring Flower. Pull the bead thread tightly.
Step2: Follow the second beading diagram to make the size ring, string 2.5mm Swarovski Beads (item C) and stop beading once your desire size ring is achieved. Make a simple knot and string another few beads. Cut the excess string. An elegant and shinny ring is completed.
Wear it during dinner and party time. And sure a lot of people will look at your hand.
Note: You may use other type of beads (cheaper cost) to replace item C!!!
Labels:
Ring
Swarovski 6721 Star Fish Pendant and Earrings
Materials:
A - Size: 20mm Swarovski #6721 Star Fish Pendant Crystal AB x 2 pcs
B - Size: 28mm Swarovski #6721 Star Fish Pendant Crystal AB x 1 pc
C - Pendant Bail x 1 pc
D - Earring hook with ball x 2 pcs
E - Chain x 1 pc
Tooling:
Super Fine flat nose pliers
Let's start :
Make a Star Fish Pendant:
Put the 28mm Star Fish Pendant in between the pinch of pendant bail. Use Flat Nose Pliers to close the pinch. Attach a chain to the bail. A Star Fish Pendant done within 3 mins.
Make a pair of Star Fish Earrings:
Attach the 20mm Star Fish Pendant to the earring hook. Take note of the direction of the crystal when attached. Repeat the step for another earring. A Star Fish Earring done within 1 min. It is fast and simple, right?
There is a lot of Swarovski Pendant series can be done with the above method. Please go to http://www.create-your-style.com/Content.Node/swarovski-elements/Pendants.en.php to find out your lovely type of pendant. Create your own style jewelry; make you look different from others.
A - Size: 20mm Swarovski #6721 Star Fish Pendant Crystal AB x 2 pcs
B - Size: 28mm Swarovski #6721 Star Fish Pendant Crystal AB x 1 pc
C - Pendant Bail x 1 pc
D - Earring hook with ball x 2 pcs
E - Chain x 1 pc
Tooling:
Super Fine flat nose pliers
Let's start :
Make a Star Fish Pendant:
Put the 28mm Star Fish Pendant in between the pinch of pendant bail. Use Flat Nose Pliers to close the pinch. Attach a chain to the bail. A Star Fish Pendant done within 3 mins.
Make a pair of Star Fish Earrings:
Attach the 20mm Star Fish Pendant to the earring hook. Take note of the direction of the crystal when attached. Repeat the step for another earring. A Star Fish Earring done within 1 min. It is fast and simple, right?
There is a lot of Swarovski Pendant series can be done with the above method. Please go to http://www.create-your-style.com/Content.Node/swarovski-elements/Pendants.en.php to find out your lovely type of pendant. Create your own style jewelry; make you look different from others.
Labels:
Jewelery Set
Basic Technique: How to use Clamshell and Crimp Bead
Materials:
A - Crimp bead silver plated x 2 pcs
B - Clam Shell x 2 pcs
C - Lobster Clasp x 1 pc
D - Extender Chain x 1 pc
E - 0.25 mm Non-Elastic Bead Thread x 1pcs (Length: 80cm)
Please use transparent bead thread for your bead work. The picture illustrate is using black color bead thread for better understanding. *o*
Tooling:
Super fine flat nose pliers
Round nose pliers
Let's start:
Step1: String left hole of a crimp bead with using left hand string, while string right hole of the same crimp bead with using right hand string as shown.
Step2: Hold both end strings and pull the crimp bead to the end of the string. Flatten the crimp bead with flat nose pliers.
Step3: String both strings to the hole of the clamshell. Pull the string till the crimp bead reaches the centre of the clamshell. Close clamshell with flat nose pliers.
Step4: Now, you can start your bead works. The next step will illustrate how to end your beadworks.
Step5: String both strings to the hole of the clamshell from bottom side. Take note of the direction of the clamshell.
Step6: Cross a crimp bead with both end strings. Pull the string tightly. Make sure don’t over tight your beadwork ooo. Make a simple knot on the string. Flatten the crimp bead with flat nose pliers.
Step7: Put some glue on the crimp bead. Close clamshell with flat nose pliers. Cut the excess string.
Step8: Attached left side clamshell with lobster clasp. Make a loop of the clamshell with round nose pliers.
Step9: Attached right side clamshell with extender chain. Same step, make a nice loop on the clamshell with round nose pliers.
If you wish to learn how to make a simple knot. Please refer to Basic Technique: How to make a Simple Knot with bead thread for the correct way of doing the knot.
A - Crimp bead silver plated x 2 pcs
B - Clam Shell x 2 pcs
C - Lobster Clasp x 1 pc
D - Extender Chain x 1 pc
E - 0.25 mm Non-Elastic Bead Thread x 1pcs (Length: 80cm)
Please use transparent bead thread for your bead work. The picture illustrate is using black color bead thread for better understanding. *o*
Tooling:
Super fine flat nose pliers
Round nose pliers
Let's start:
Step1: String left hole of a crimp bead with using left hand string, while string right hole of the same crimp bead with using right hand string as shown.
Step2: Hold both end strings and pull the crimp bead to the end of the string. Flatten the crimp bead with flat nose pliers.
Step4: Now, you can start your bead works. The next step will illustrate how to end your beadworks.
Step5: String both strings to the hole of the clamshell from bottom side. Take note of the direction of the clamshell.
Step6: Cross a crimp bead with both end strings. Pull the string tightly. Make sure don’t over tight your beadwork ooo. Make a simple knot on the string. Flatten the crimp bead with flat nose pliers.
Step7: Put some glue on the crimp bead. Close clamshell with flat nose pliers. Cut the excess string.
Step8: Attached left side clamshell with lobster clasp. Make a loop of the clamshell with round nose pliers.
Step9: Attached right side clamshell with extender chain. Same step, make a nice loop on the clamshell with round nose pliers.
If you wish to learn how to make a simple knot. Please refer to Basic Technique: How to make a Simple Knot with bead thread for the correct way of doing the knot.
Labels:
Basic Technique
Simple Swarovski Rondell Cylinder Necklace
Materials:
A - Metal chain 1mm x 1 meter
B - 8mm Round Rondell with one hole x 2 pcs
C - 10mm Swarovski Round #5000 Black Hem 2X x 1 pc
D - Crimp bead silver plated x 2 pcs
E - Lobster Clasp x 1 pc
F - Cord-end connector x 2 pcs
G - 5mm Round Jump Ring x 2 pcs
H - Extender Chain x 1 pc
Super Fine flat nose pliers
Let's start:
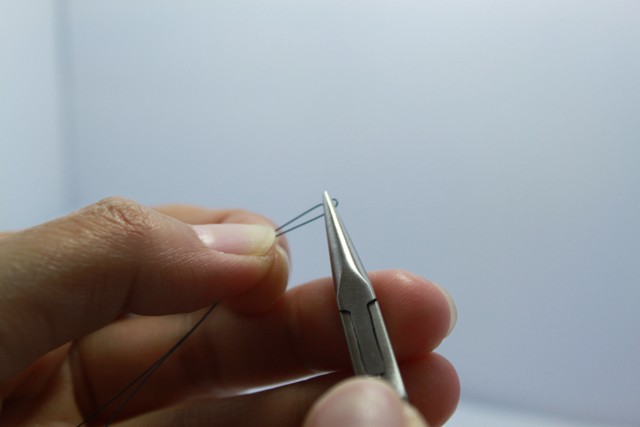
Step1: Put the end of left side chain to the cord-end connector. Flatten cord-end connector with flat nose pliers.
Step7: Attached right side chain and extender chain with jump ring.
Step8: Pull the items at step 2 to the center of the chain. With using flat nose pliers, flatten the item D for both sides. The rondells and crystal are fixed at the center of the chain.
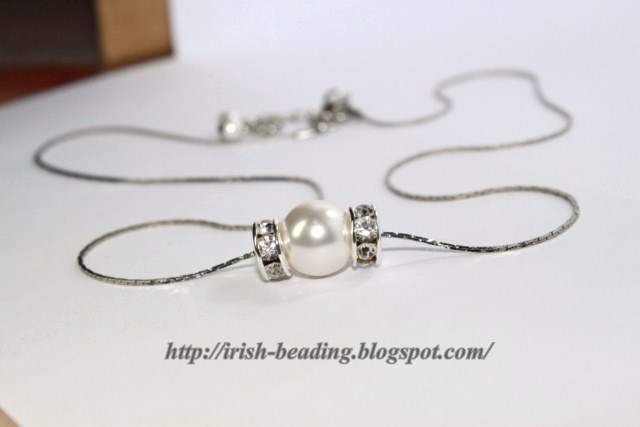
Yeah! Yeah ! A simple and cheap necklace is finished with simple 8 steps.. How do you feel now? Proud? Happy? Fantastic? No matter which answer you have… ^o^ Just a simple creativity, you can make a simple and cheap necklace with you own style..
For those lady who crazy on Pearl, you may use 10mm White Pearl to replace the item C. You will find another sweet design@@@
A - Metal chain 1mm x 1 meter
B - 8mm Round Rondell with one hole x 2 pcs
C - 10mm Swarovski Round #5000 Black Hem 2X x 1 pc
D - Crimp bead silver plated x 2 pcs
E - Lobster Clasp x 1 pc
F - Cord-end connector x 2 pcs
G - 5mm Round Jump Ring x 2 pcs
H - Extender Chain x 1 pc
Tooling:
Round nose pliers
Cutter
Let's start:
Step1: Put the end of left side chain to the cord-end connector. Flatten cord-end connector with flat nose pliers.
Step2: Add items 1xD, 1xB, 1xC, 1xB, 1xD through right side chain.
Step3: Measure the length of the chain base on your preference. Cut the extra chain with cutter.
Step4: Repeat step 1 to close the right end chain.
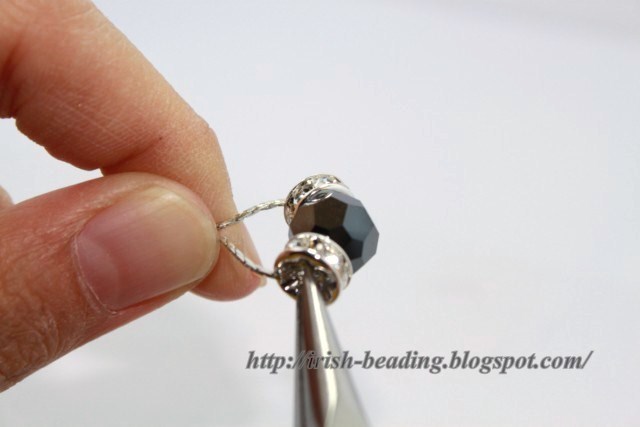
Step5: Open 2 pcs of jump ring as illustrate.
Step6: Attached left side chain and lobster clasp with a jump ring.
Step7: Attached right side chain and extender chain with jump ring.
Step8: Pull the items at step 2 to the center of the chain. With using flat nose pliers, flatten the item D for both sides. The rondells and crystal are fixed at the center of the chain.
For those lady who crazy on Pearl, you may use 10mm White Pearl to replace the item C. You will find another sweet design@@@
Labels:
Necklace
Saturday, May 14, 2011
Basic Technique: How to make a simple knot with bead thread
A good knot must be made to prevent your finished beadwork loose. In this post, I will illustrate how to make a correct knot for the bead thread. For better understanding, I am using different string to illustrate. Don’t misunderstanding ooo...
Let's start:
Step1: Follow the pictures below to make a tight knot.
Step2: To prevent the beadwork loose, pull down the bottom knot first then follow by the top knot.
Let's start:
Step1: Follow the pictures below to make a tight knot.
Step3: Wrong knot as shown. Take note on the red circle part.
Labels:
Basic Technique
Subscribe to:
Posts (Atom)